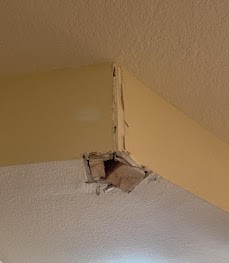
A small hole in the wall is one of the most common damages in any home — and also one of the easiest to fix yourself. Whether it came from a doorknob, a fallen picture frame, or moving furniture, you do not need to call a contractor for every little hole. With a few dollars in materials and 30 minutes of your time, your wall can look like new.
In this guide we show you step by step how to fix a small hole in your wall the right way, with the same techniques professionals use in Riverview homes every day. And we also tell you honestly when a hole is too big for DIY and needs a professional touch.
What You Will Need
- Spackle or lightweight joint compound (a small tub costs $5–$10)
- Putty knife (2″ is perfect for small holes)
- Fine sandpaper (120 or 150 grit)
- Clean damp cloth or sponge
- Paint that matches your wall (or primer + paint if the wall was never painted)
All of this is available at any hardware store in the Riverview or Brandon area for under $20 total. If you already have some of these at home, even better.
Step 1: Prepare the Hole
Start by cleaning the area. Remove any loose pieces of drywall paper or broken texture around the hole with your finger or the putty knife. Then wipe the area with a damp cloth and let it dry. A clean surface helps the spackle stick properly.
If the hole has a torn paper edge sticking out, press it down gently or cut it flush with a utility knife. Raised edges will show after painting.
Step 2: Apply the Spackle
Take a small amount of spackle with your putty knife and press it into the hole using smooth strokes. Do not just smear it over the surface — push it in so it fills the hole completely.
Here is the pro secret: apply the spackle slightly wider than the hole, feathering the edges outward so it blends with the wall. Then scrape off the excess with the putty knife held at a 45-degree angle.
For nail-size holes, one coat is enough. For holes the size of a coin or bigger, let the first coat dry and apply a second one.
Step 3: Let It Dry
Most lightweight spackles dry in 30 minutes to 2 hours, but check the manufacturer’s instructions on the tub. The spackle changes color as it dries — usually from pink or gray to white.
Do not rush this step. Sanding wet spackle ruins the repair and you will have to start over.
Step 4: Sand It Smooth
Once completely dry, sand the area with fine sandpaper using light circular motions until it feels perfectly smooth and level with the wall. Run your hand over it — you should not feel where the repair starts and ends.
Wipe away the dust with a slightly damp cloth before painting.
Step 5: Paint the Area
This is where most DIY repairs fail. If the paint does not match, everyone will see the spot, even if the repair is perfect.
- If you have the original paint can, shake or stir it well and apply it over the repair
- If you don’t have the exact paint, take a clean cut piece of the drywall (from an unseen area like inside a closet) to a paint store for color matching
- Paint just the repaired spot first, then extend slightly beyond it with light strokes
- In Florida’s bright light, two thin coats almost always look better than one thick coat
Pro tip: sometimes it is better to repaint the entire wall instead of only the spot. Fresh paint on an old faded wall will always look like a patch, even with the exact same color.
When a Hole Is Too Big for DIY
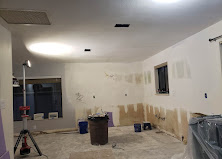
Honest truth from people who do this every day: this method works great for holes up to about 2 inches. Beyond that, you need mesh tape, actual joint compound (not spackle), multiple coats, and texture matching — and that is where DIY repairs start to look bad.
Call a professional if:
- The hole is bigger than 2–3 inches
- The wall has texture (knockdown or orange peel are hard to match)
- The drywall is wet, soft, or has mold
- You see several nail pops or cracks around the area
- The damage is on a ceiling
A professional repair costs $125–$250 for a medium hole in the Riverview area, and the result is invisible after painting. Sometimes paying a little is cheaper than buying materials, spending your weekend, and ending with a visible spot on the wall anyway.
Frequently Asked Questions
Can I use toothpaste to fill a hole in the wall?
It is a popular trick for tiny nail holes, but toothpaste shrinks, cracks, and can attract moisture. A small tub of spackle costs less than $10 and does the job right.
What is the difference between spackle and joint compound?
Spackle is for small holes — it dries fast and is easy to use. Joint compound is for bigger jobs, taping, and texture work. For holes bigger than 2 inches, use joint compound.
How long does it take to fix a small hole?
About 30 minutes of actual work, plus drying time. Most small repairs are ready to paint the same day.
Got a bigger hole, ceiling damage, or texture that needs matching? That is our specialty. At Drywall Repair Riverview Fl we fix walls and ceilings across Riverview, Brandon, and the entire Tampa Bay area — licensed, insured, and with free on-site estimates.
📞 Call 813-526-2369 today or send us a photo of the damage — we will tell you honestly if it is an easy DIY fix or if we should handle it.